Promoting your business on the Internet doesn’t need to require a great deal of money in order to produce positive results. Simply spending a few minutes a day managing social networking profiles can yield great results and wouldn’t cost you a single dime out of pocket. Pinterest is one of those sites that can be greatly beneficial to promoting your business.
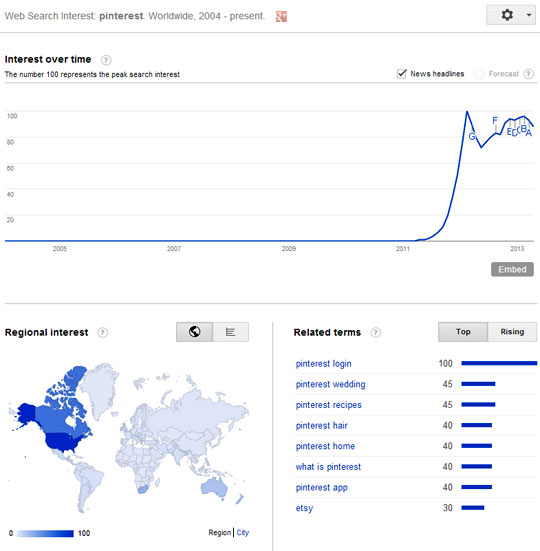
The interest in Pinterest has been growing steadily as more and more accounts are created. The site allows users to share imagery they have either found on the Internet or have developed themselves.
Like all social media websites, users are able to like and comment on an image or even “repin” it. This image is then displayed for all of those who are following that particular person. Theoretically, you would be able to reach a vast amount of people from a single well developed image for your business.
Here are six useful tips how to use Pinterest to promote your business
1. Complete Your Pinterest Profile
Completing your Pinterest profile is very important for promoting your business. The profile is what most people will see first when visiting your Pinterest page. The more detailed this information is, the better are your chances of creating a visitor back to your main business website. Links and information regarding your business need to be posted here in order to help maximize the experience.
2. Connect with Facebook
Within the settings of your Pinterest account is the ability to use Facebook as your login method and an option to post to your Facebook timeline any changes you make to your Pinterest account. Why is this important? Because you are able to generate interest between both social sites from managing a single image. Any of your friends, family, and fans can witness what changes are made to your Pinterest account giving them the ability to visit the site. As long as your information is public, anyone viewing your Facebook timeline can see all of the additions you’ve made to Pinterest.
3. Pin Your Images Correctly
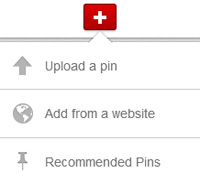
The easiest way to start pinning is by clicking the “+” button in the top right of your account next to your image. Click the button and a pop-up window will be displayed with three options: Upload a Pin, Add from a website, and Recommended Pins.
Upload a Pin: Once you click the option for uploading a pin, you will need to navigate to where the image is located on your computer. Choose your image and select a proper board for it. If you don’t yet have a suitable board you can create one from here as well. Then, write a short description for your image; you are able to enter upto 500 characters for this.
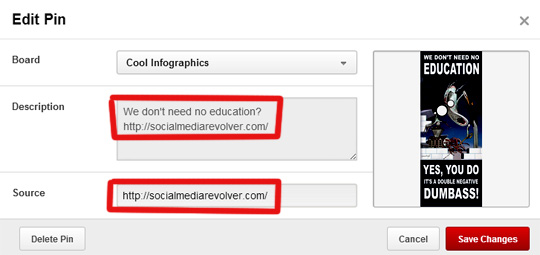
The whole purpose of pinning images for business is that people can visit your website/blog/Facebook page etc. from your pins. Therefore you will need to make sure that you add your business URL to the pins. You should do this is two places: somewhere (preferably near the beginning) in the description box of your pin, and as a backlink from your image.
The first one easy enough, but in order to get the link on to your image you will have to go and “edit” your pin. For this go to the board where you uploaded the pin and click the edit -button at the top of your image. Add your business URL in the Source box.
Congratulations! You have now equipped your pin with two valuable links back to your business website and people can visit your site after seeing your pin.
Click here to see the funny educational pin used in this example and see how the two backlinks work in action.
Add From a Website: You can also pin images direct from websites or blogs to your boards. Choose this option and enter a website or a blog post URL into the box and click the “Find Images” button. Pinterest will then scan the website for pinnable images and videos. After a few moments, you are able to scroll through the available images and select the one you want to pin
You are then able to add it to any image board you have created or, again, you can create a new one on the go. When the image is saved, a link from the pinned image to the original website location will be created automatically. The originating website can also be accessed though the Visit Website -button at the top and via the link at the bottom left of the pin.
You can use this to your advantage if you already produce unique and attractive imagery for your website or blog. If you don’t, it would be recommended that you’d start introducing “pinnable” images on your site; and use the Pin It -button for sharing them. (We will show you how it’s done in another article released shortly. Subscribe and stay tuned! Our subscription box in on the right near the top.)
You can also install a Pin It Bookmarklet which enables you to pin images and/or videos straight from your browser. This is a very handy and time saving widget if you are getting to be a serious Pinterest user.
4. Write Good Descriptions
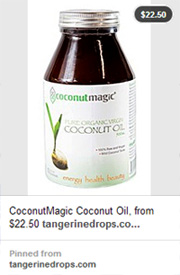
If you are selling your goods through Pinterest, add the price into the description and Pinterest will show it in the top right hand corner of your image.
Creating boards will allow you to sort out and differentiate your image collections. This is a way that you can separate content accordingly. If you need extensive organisation of your imagery, the boards are the way to go about it.
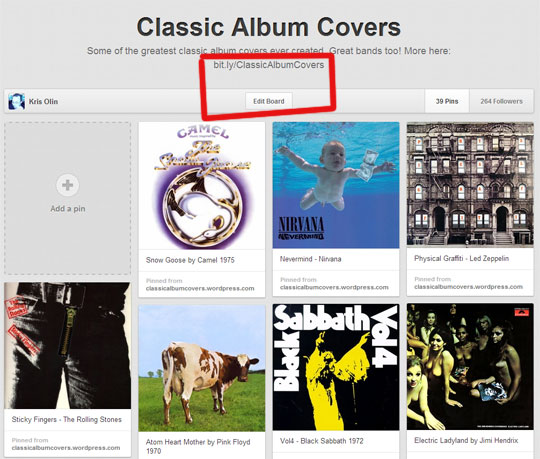
Just like your images your boards need to be equipped with good descriptions. You can do that when creating the board or by clicking the Edit Board -button. Write a good description using your key words and also choose a proper Category for your board.
If your board presents material from a particular website you should also add its URL into the description. It will not be hotlinked but most people would be able to just copy and paste it into their browsers.
You can also choose to keep your board secret if you like. Secret boards are only visible to you and to people you invite to pin on it. When you, or any of your “board members” add an image to the board it will not show up anywhere else on Pinterest and it will not be visible in the categories, search results or image feeds. As the main purpose here would be pinning and sharing your images for marketing purposes secret boards are not the way to go.
5. Be Imaginative
For greater impact on the community, your images should be tastefully completed. If you are having troubles coming up with an idea, base the image on what your company excels in. If you have a computer repair business, images containing computers, hammers, and screwdrivers can get someone’s attention. Of course, mayhem can drive a great deal of traffic. A picture of a railroad spike driven through a hard drive is sure to peak computer geek interest!
Social media sites can be a superb method of marketing your business providing you put the time into maintaining it. Pinterest is no different. A handful of well designed images may get a few people to show interest in your business, but a constant flow of visual candy can make a great impact on the community. Keep the images fresh and you will see a difference in your online presence.
6. Verify Your Account
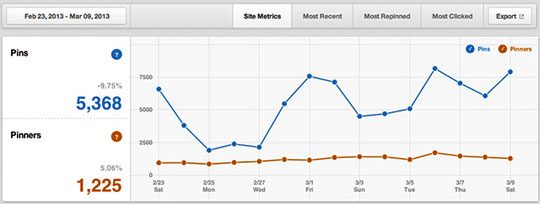
One of the biggest reasons you want to verify your website account information is so that you can take advantage of Pinterest’s Analytics. Analytics can be helpful when determining the activity of your verified website. This can be found when expanding your account information using the new look of Pinterest.
Using the analytics tool, you can see how often your images are used throughout the community including how often your images were clicked in order to send traffic to your website. From a business standpoint, this can help you create an improved strategy of what images produce the best results and the content within them.
Verifying your account is a simple process of uploading a HTML file that is provided during the verification process. When you verify your account, Pinterest will offer a downloadable file that you can save to your computer. You then upload this file to your website in the directory you established when setting up your account – this is usually the root folder. After you upload the file, click on the button in your Pinterest settings and have the website verified. This will create a link to your site that others can see displayed within your profile. This creates a link for others to click as well as text information that can be crawled by search engines to further increase your website’s presence, if even slightly.
Should You Use Pinterest For Your Business?
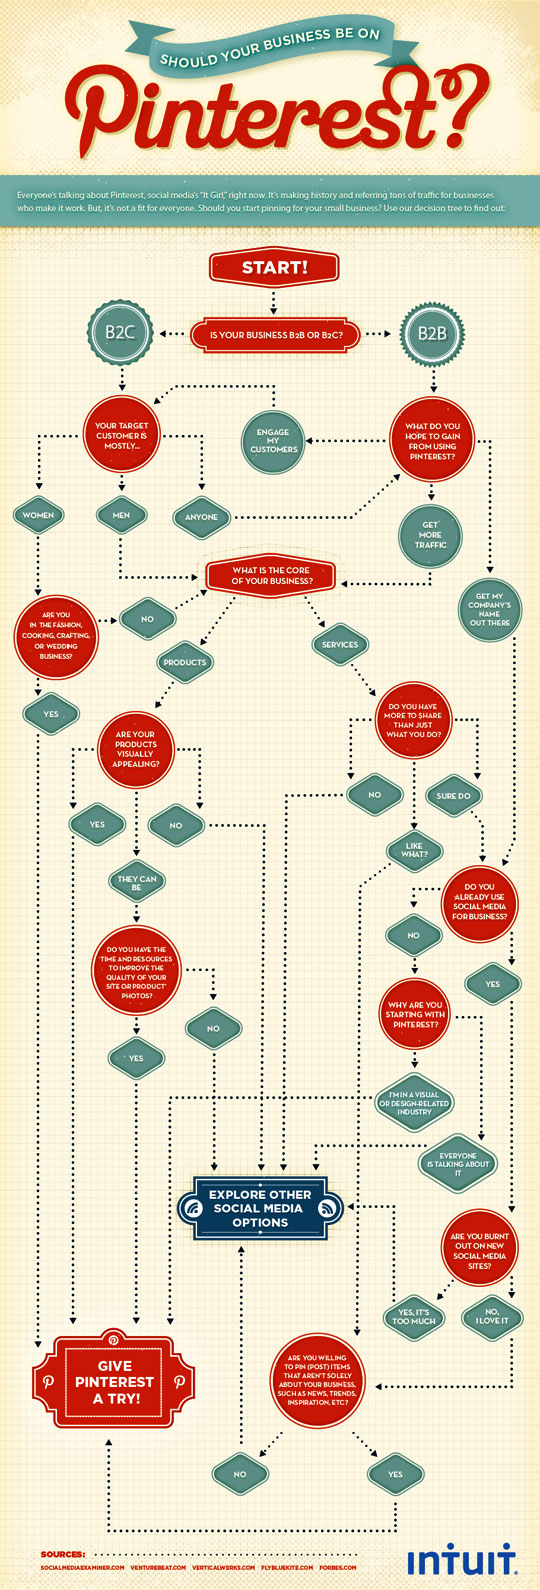
OK, now that you know how to use Pinterest for business purposes should you be using it? Here’s a nice Infographic from Intuit that might help you answer that question.
Follow Us
As you might have guessed, Social Media Revolver is also on Pinterest. Please follow us here.
[Image credits- Main: Flickr Mikey, Creative Commons Attribution 2.0 Generic CC BY 2.0; Infographic, Column Five Media]
Ken Myers is an expert advisor on in-home care & related family safety issues to many websites and groups. He is a regular contributor to gonannies.com. You can get in touch with him at kmyers.ceo@gmail.com.
Comments are closed.