Images are an important part of any website and will in fact have the biggest impact of all on anyone who decides to go online and load up your site.
However despite this, and despite the fact that an image is reportedly worth a thousand words, many webmasters will nevertheless overlook the importance of them and will be happy to just look on Google for an image that fits their purposes and slap it on their site. This is not only bad for the appearance of their site, but can also have some legal considerations for website owners.
If you’re guilty, put your hand up…
Having the correct images on your site will make your pages pop and draw the eye, it will make your links stand out more on social networks, and it will give you more authority and respect from the viewer.
Here we will have closer look at some quick tips for using the best images for your website or blog.
1. Consider Your Color Scheme

2. Choose High Definition
You should always make sure that the images you use are high definition. If they look grainy or surrounded by noise they will make your site look unprofessional and/or very old. This will mean that people are less likely to stick around.
3. Choose Small File Sizes
You should always choose small file sizes when you upload your images. This means choosing the correct file format and making them no bigger than they need to be. You shouldn’t think about sacrificing quality though, but you shouldn’t have a gigantic 5000×5000 image either if you are going to set the image height and width to 50×50 in your HTML.
Bother to resize the images and make multiple versions if necessary, and choose PNG or JPG over BMP as the file format. Your bandwidth and your site’s loading times will thank you. Picresize and Resize Your Image are handy and free tools for this purpose.
4. Be Original
Wherever possible make sure that the images you use are unique and original. If you know someone who is a photographer or a graphics designer then it’s worth getting images made specifically for the site. People will be able to tell, and your website or blog will look 100 times more professional as a result.
5. Face In
Apparently in the best online pictures the subject will always face in towards the text rather than out and away from it. So if you have a picture of a person on the right hand side of a block of text, they should be looking left ie. looking at the text.
Bonus Tip – Creative Commons Licensed Images
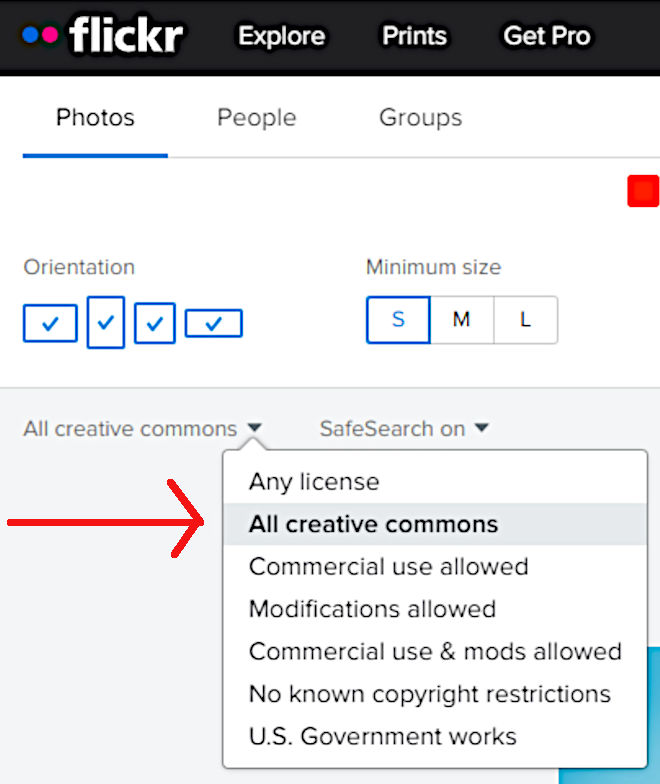
Flickr is one of the primary image sharing websites in the world and they have a huge collection of copyrighted as well as roalty free images available.
The trick here is to use the custom search options. Once you are logged on to your Flickr account go to the search area and click the Advanced +button. This will take you to a page with lots of different search criteria you can use. One of them is labelled All Creative Commons.
You will get a huge collection of cool images that you can use in your web and other creative projects. Remember to credit the photographer the way they require though!
[Recommeded reading: How To Use Stock Photos Without Getting In Legal Trouble]
[Image credits – Main photo: Flickr/Kris Olin; other images, videos, infographics or screen prints are from their respective websites and/or social platforms]
The author of this post, Todd Ramos, is the owner of Todd SEO Guy and he offers SEO services to clients through his website. He likes to read books and listen to music in his free time.


Comments are closed.